It's timber and is not looking too good. You're a dab hand at this stuff now.
Don;t mind the asbestos, I'll provide you with a facemask that you can use down the local supermarket too.
Nice build BTW>


Keeno wrote:As the build is now finished I thought id do a condensed post of all the steps.
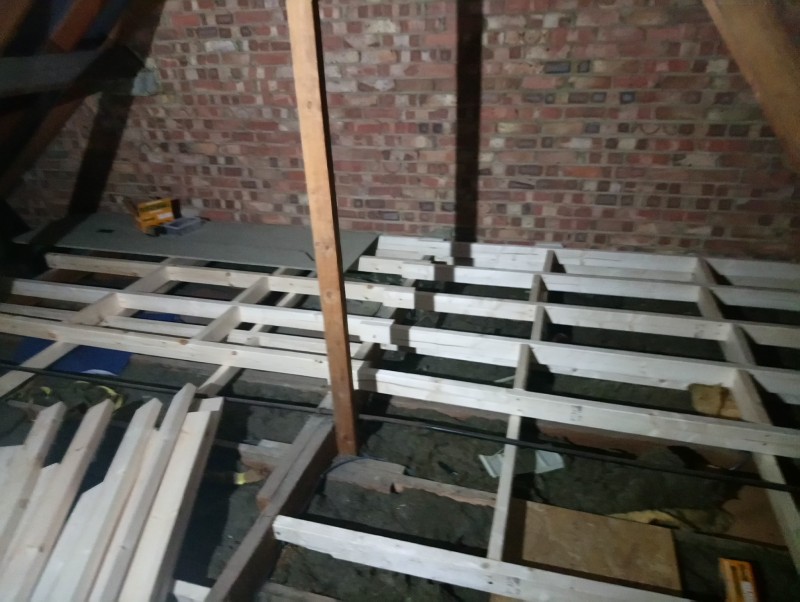
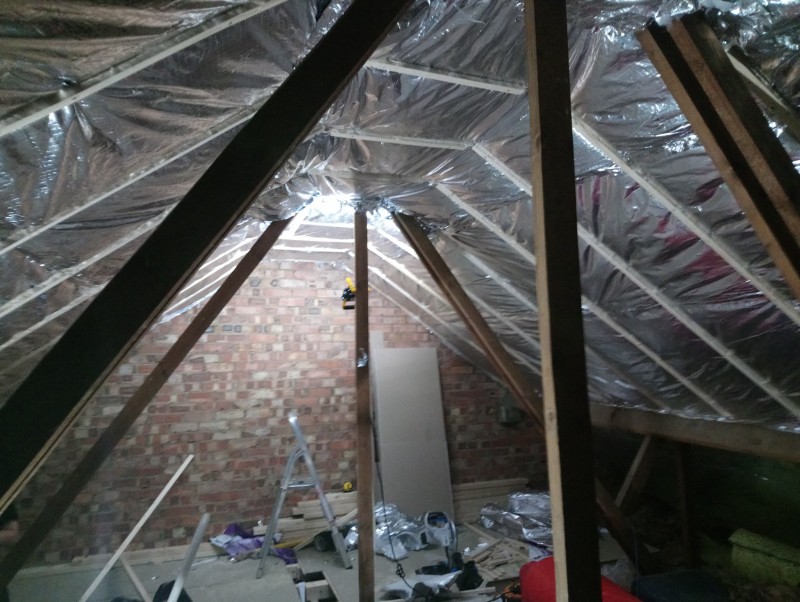
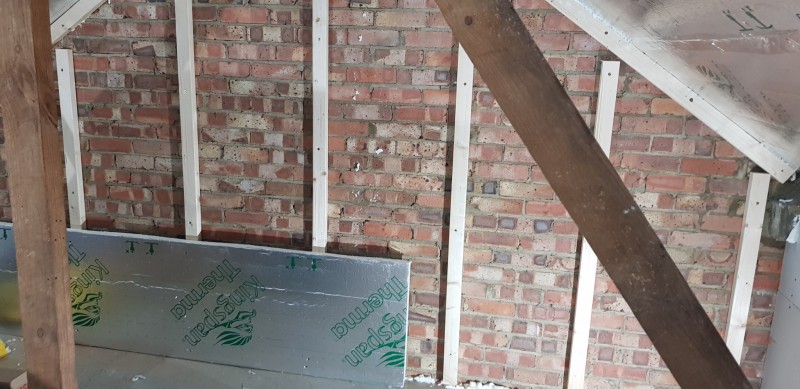
Step 1 - New Floor
To start I had to install a new suspended floor. The existing woodwork below was uneven and not in the best shape. Also, the existing wiring was run with a metal conduit. To move this would have meant an entire rewire on the upstairs of the house. Not something I wanted to get involved in.
By installing a new floor it gave me a blank canvas to work from and an even floor throughout the whole loft.
I used 4x2 timber for this, this isn't really up to the job but timber prices and the weight of the larger sizes of wood were a bit much for what this space would be used for. I instead braced the new floor with more 4x2 timber, just picking up the middle of the new joist to stop any bowing of the new floor.
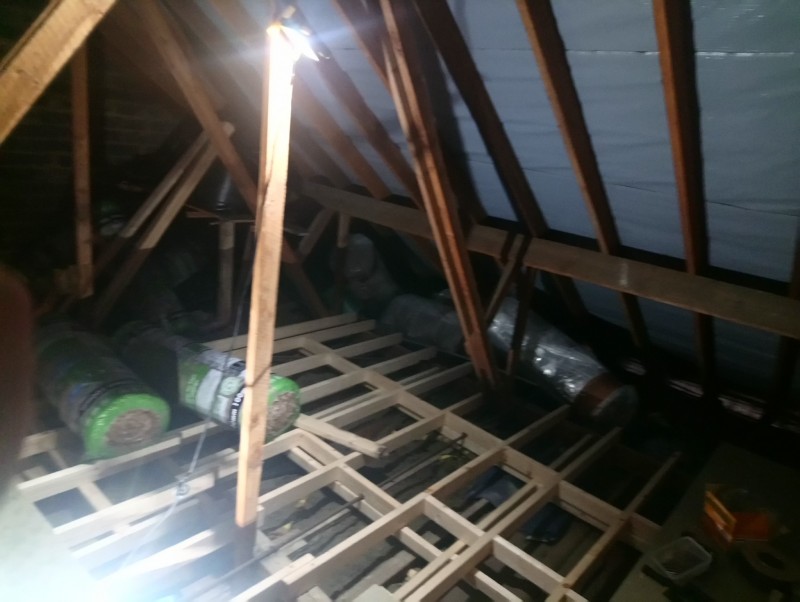
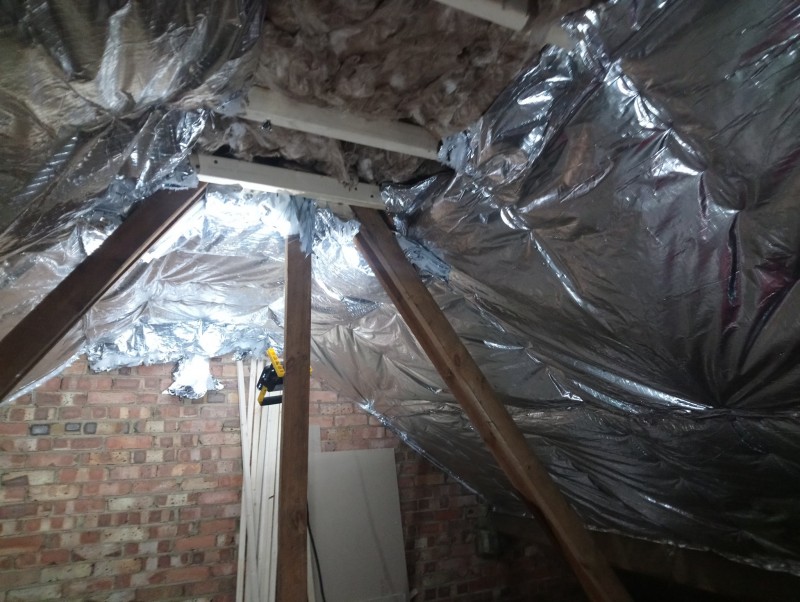
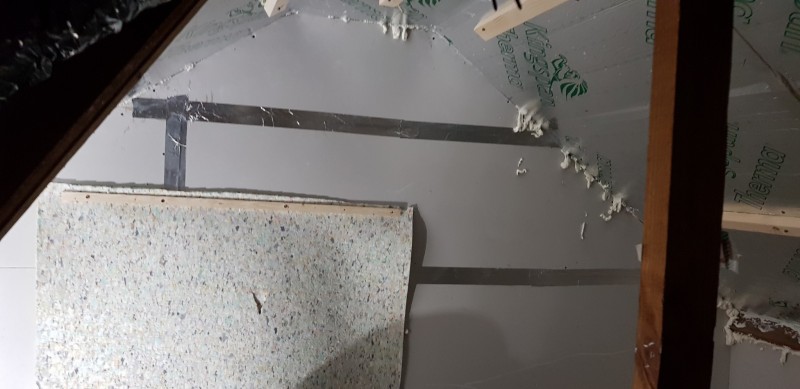
Step 2 - Insulation
Being a loft this area will be difficult to control the environment in without the necessary insulation. In my years growing and following other growers environments has always been the worst aspect of loft growing. I decided to insulate properly. I've grown in outbuildings before and not done this step properly, this only adds to sleepless nights and stress in the colder and hotter months.
I decided to use a mix of insulation:
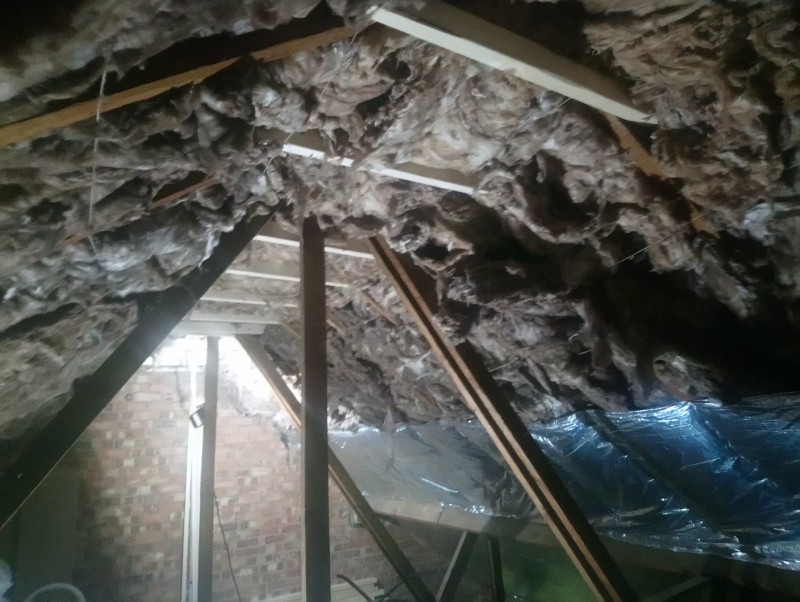
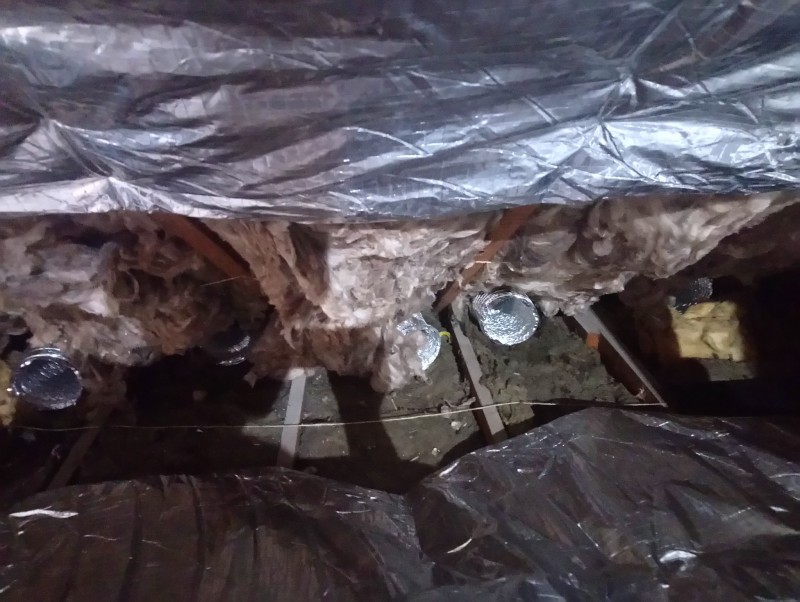
100mm Earthwool in between the roof rafters.
YBS super quilt over the rafters.
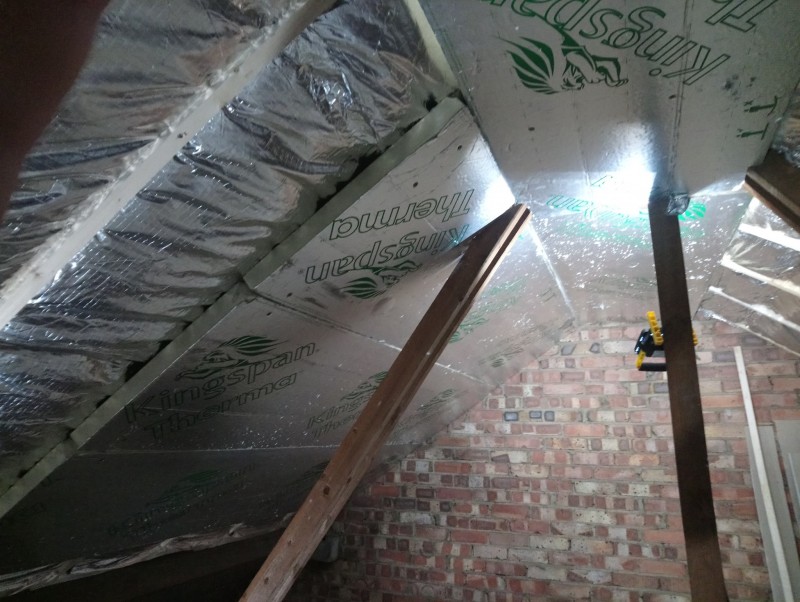
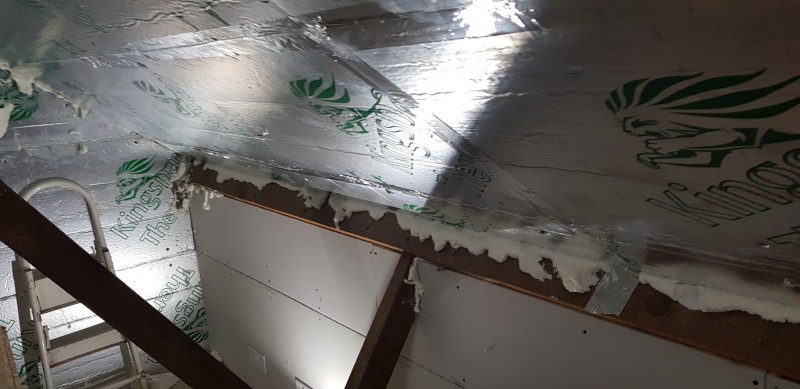
50mm Kingspan over this.
Any Gap in the insulation was filled with expanding foam and covered with aluminum tape.
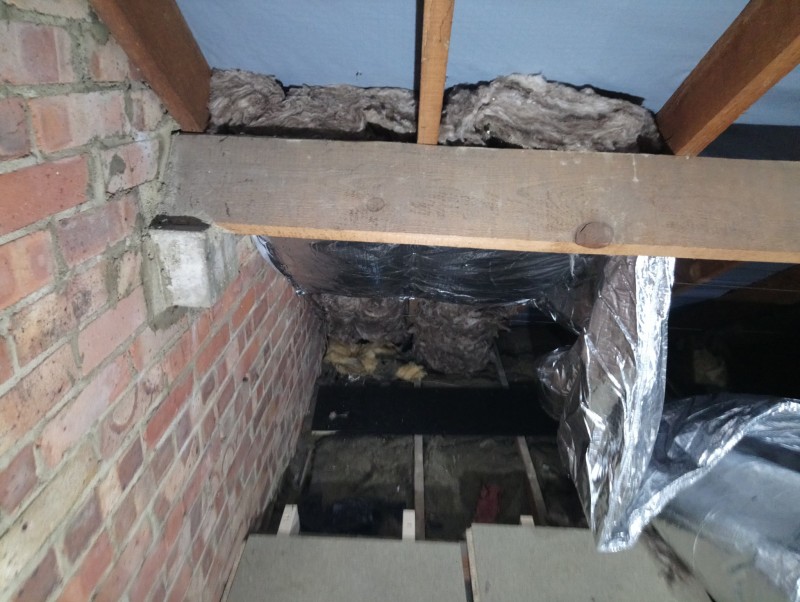
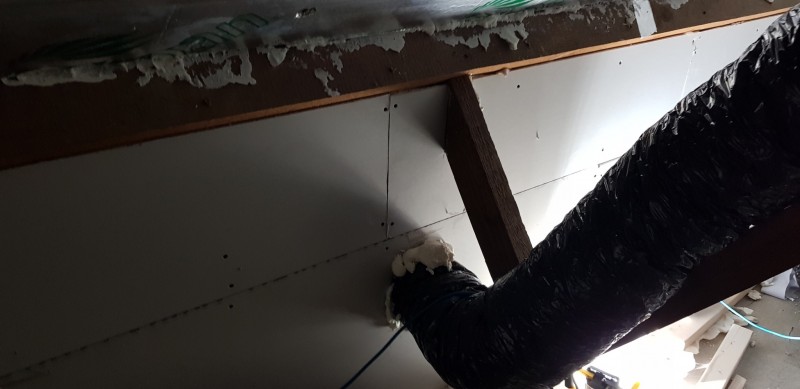
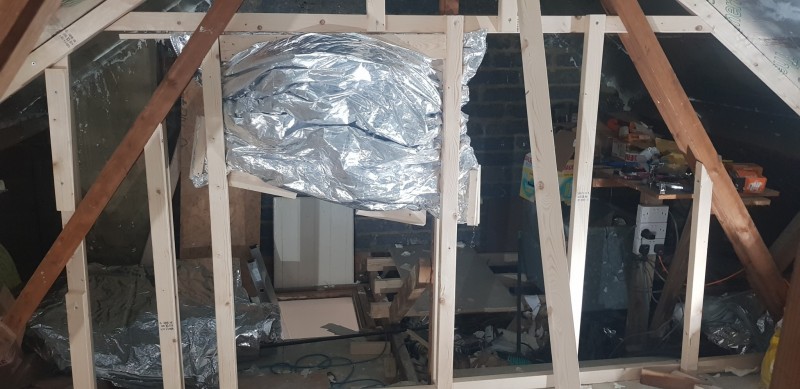
Step 3 - Air circulation
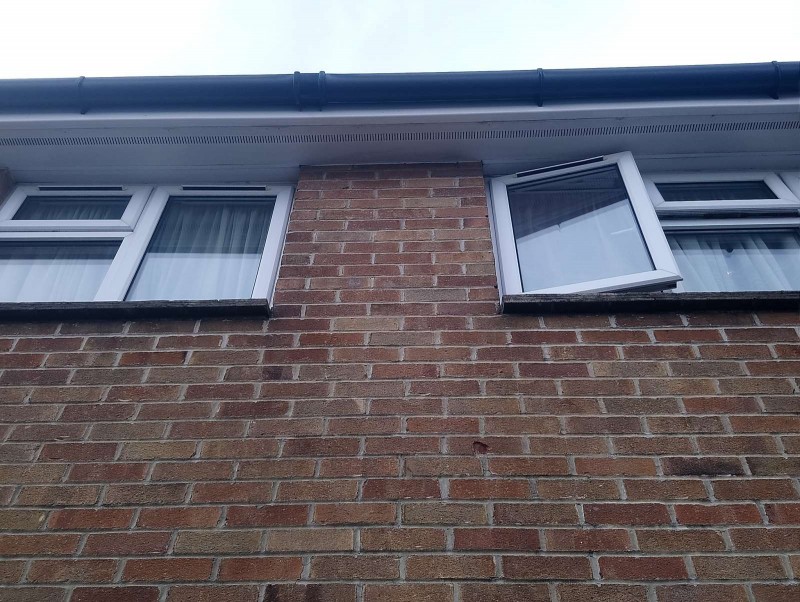
The house has vents running all along the facia front and back. This is a lot of area to move air through. The idea was to seal the actual eaves of the roof (corners where the vents are), then pull air in the side that gets no sunshine, push hot air out the side that does.
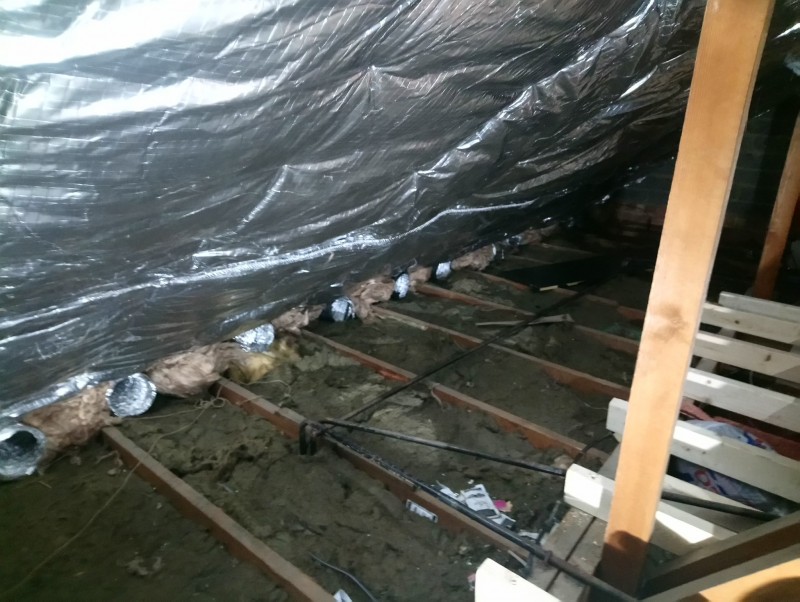
I started by pushing old ducting cut into small pieces down into the facia where the vents are. Filling the gaps in between with earth wool.
I then place a stud wall in front of the ducting and vents. I used some more old ducting to create passive air movement from the sealed eaves to the next cavity. This second cavity is an empty area cavity designed only to let air in from the eaves and into the next part of the build, the groom.
I then plasterboarded the 2nd stud wall which is now the inside wall of the groom. In this 2nd wall, I put more old ducting. This effectively works like below:
Air vents on the outside of the loft to a sealed area.
Sealed area to 2nd sealed area.
sealed area to groom.
All allowing air in and out passively. Also, the 2 air spaces separated by stud walls will reduce noise.
2 150mm L1 System air RVK fans are doing the extraction. They pump air into one of the sealed areas, this then passively pushes air into the 2nd sealed area with the vents.
The system works great. The large vent surface allows 2 high-powered fans worth of air out of the vents with no noise, I mean zero. I've stood out there at 4 am and not a sound.
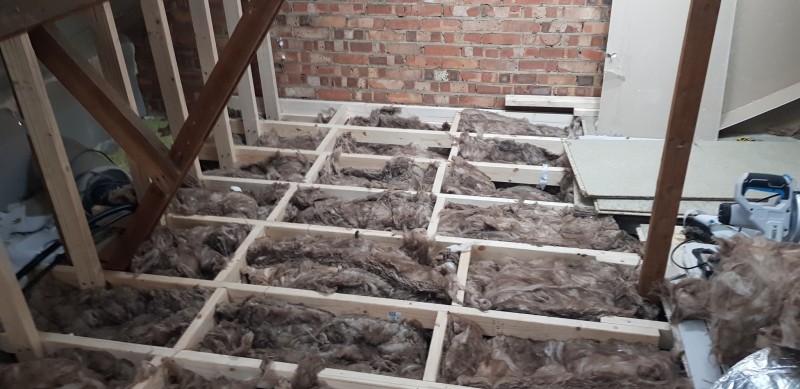
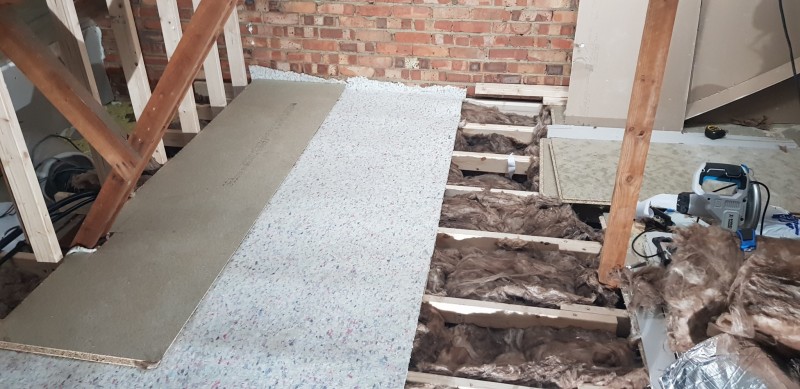
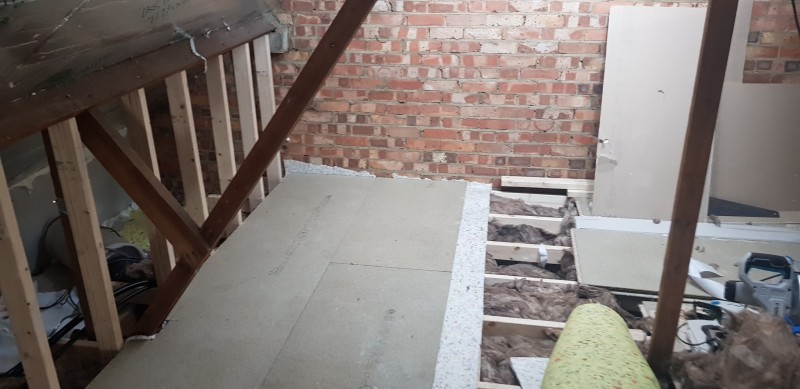
Step 4 - Laying the new floor
First I laid 100mm earth wool into the cavity between the old joist and the new suspended floor I installed.
Next, I laid 12mm foam underlay. This is more for soundproofing than anything else.
On top of the foam, I put 18mm of chipboard flooring.
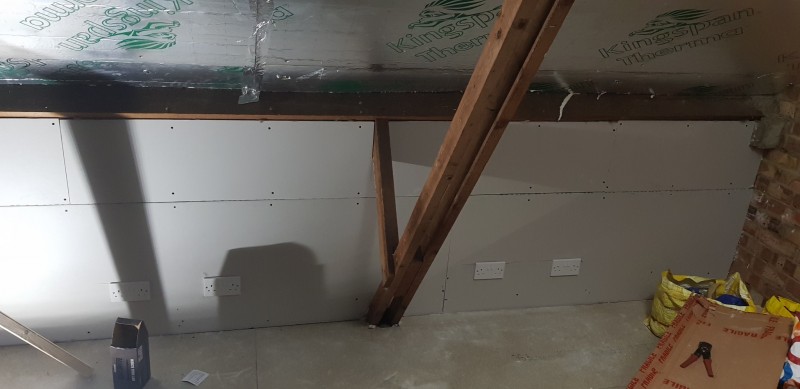
Step 5 - Separating walls
The walls here are thicker than a normal house but still, it's best to be safe. 3 x 2 CLS timer topped with 50mm Kingspan.
The other wall is a stud wall with a door, this was plasterboarded and insulated with earth wool.
And that's about it for the actual build. I've ended up with just under 4 x 4 meters of area. I'm only using a small part of this along the back wall. The larger area will be easier to control the environment in.
The electrics were connected by a professional, and are on their own remain. I've not documented any of this as I'm not an electrician and that stuff is dangerous.
The only bit that's not in here is the feed and drainage as I didn't get pictures of that before putting the floor over the top of it. The way it's set up is to stop me needed or storing water in the loft. It's indeed risk and weight.
Thank you all for following the build. I'll get a video of the room soon if I remember.
 Now you’re just showin off
  it looks great!
That's the plan mate. Environment seems controllable with current kit. We've had some hot days since it's been running, wet, humid, all seems fine.
Only if there's a lot of maccy d on offer. I sweated, like actual real sweat doing this, nearly lost waitMarcus wrote: ↑Sun Aug 15, 2021 3:51 pmHi Keeno, you fancy popping round and doing my garage for me?
It's timber and is not looking too good. You're a dab hand at this stuff now.
Don;t mind the asbestos, I'll provide you with a facemask that you can use down the local supermarket too.
Nice build BTW>

Get some mixed grills and Sunday dinners down ya!Keeno wrote: ↑Sun Aug 22, 2021 1:30 amOnly if there's a lot of maccy d on offer. I sweated, like actual real sweat doing this, nearly lost waitMarcus wrote: ↑Sun Aug 15, 2021 3:51 pmHi Keeno, you fancy popping round and doing my garage for me?
It's timber and is not looking too good. You're a dab hand at this stuff now.
Don;t mind the asbestos, I'll provide you with a facemask that you can use down the local supermarket too.
Nice build BTW>

 Growroom420 Podcast